Here are some tips and tricks to make your Android auto experience to the next level. Let’s take a look at some ways to unlock some useful tips and tricks so that we will have access to amazing features.
Have you come across android auto feature? If you haven’t then it’s time for your to take a look at this impressive feature if you drive a car. With this feature you can safely and easily have access to navigation, apps or your favorite music on the way. You can safely drive your vehicle while accessing these features.
have a more seamless driving experience with android auto and say bye to distraction. Let’s take a look at the tips and tricks to make use of this.

Android Auto and Google Assistant Driving Mode
A previous version of Android auto which was designed by Google allows you to access your phones display but they no longer available as they are supposed to support only infotainment unit in your car . Google assistant driving mode is what you have to make use of now, which somewhat has the same features with slight differences.
Below we will take a look at some Android auto features. Note that these tips and tricks can be used for driving mode as well.
Take Advantage of Google Assistant
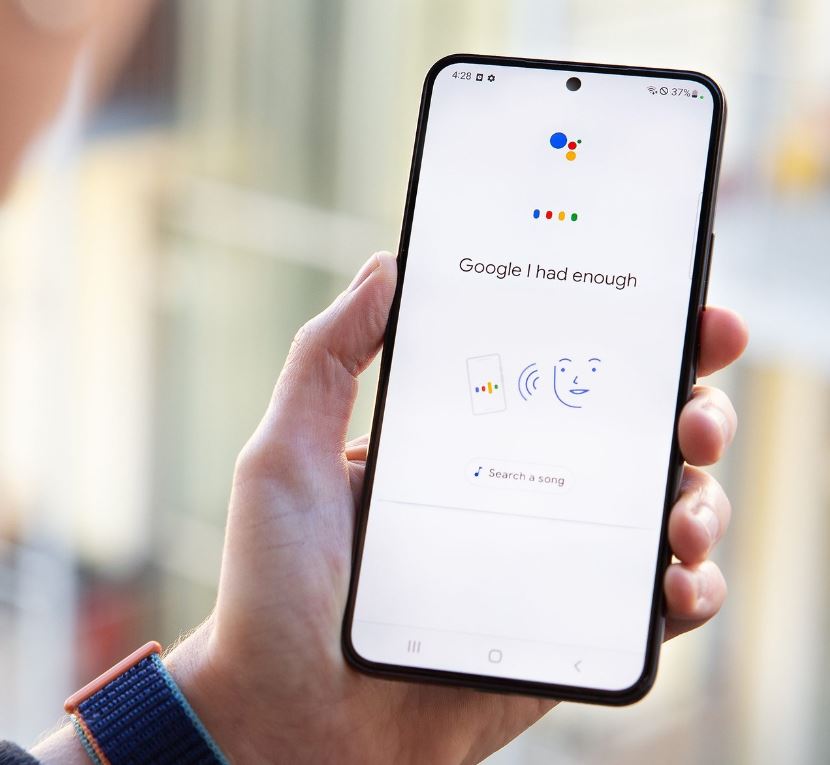
It necessary to master the Android auto features and, the Google assistant plays an important role in voice command. The Google assistant helps in safe driving and to provided information’s swiftly. All you have to do is provide a voice command if you want to turn of that music, give a call or to ask a question. You don’t have to touch your phone while driving.
All what you have to do is say "Ok Google" or you can turn on the Voice command button on your steering wheel. This way you can easily ask a question or skip a song . You could also make a call while you’re driving with just your voice command. The driving mode also provides a mic icon that you can tap while driving which will activate the Google Assistant.


Certain common google commands would work even while you are driving but remember that not each and everything will be taken into consideration. Check below for the common questions you can ask so that google assistant will reply you instantly.
Give me a reminder in 30 minutes to buy some groceries.
Let me know the news today
Call Mary
How long would it take to go to park lane
Who won the world cup last night?
Stop song
Android Auto-Compatible Apps
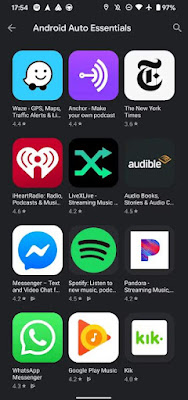
It is dangerous when you are distracted with certain apps while driving so many of the apps are not supported by android auto. Don’t worry because there are many important and good apps that you can choose from. Below are a few apps that you can get.
Head to the Android auto page that you will find in Google apps. Below are the main categories of Android auto apps that would interest you.
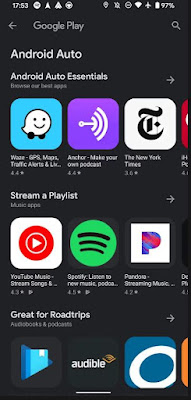
The first category is music. You can find apps like Amazon music, YouTube music, Spotify and Pandora.
Google map is already a built-in app in android system navigation so this works well with Android auto. On Android auto you can also use Waze to navigate instead of Google map. Audible which is an audio book app will work too.
If you go to the driving mode or Android Auto, certain apps like music or radio will be shown if you have installed them. You can check what these apps provide you while you are driving.
A pop up notification will be seen when you get a new message if a messaging app is installed as the specifications are a bit different than the other apps that we saw. So if you get a message you have to cover the other person that you are driving so to let them know you can speak your message by tapping reply or you can also send automatic respond command.

If things get a bit annoyed and you no longer want to receive any messages the you can mute the conversation so you don’t get any notifications from those apps.
Organizing Android Auto App List
Your home screen already provides the apps that support your Android device on the home screen but the problem arises if you have too many apps installed and it is cluttered all over. This would definitely be a hindrance for your driving.
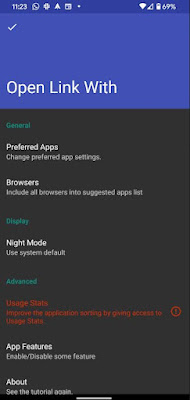
Don’t worry as you can always omit or rearrange the apps on your home screen. To do this go to "customize launcher" on the menu of Android auto app. Here you can decide what to do.

You can customize the apps as you want in the alphabetical order which will be the suggested app or you can select custom order. If you want to take off an app from your screen launcher then you can remove it by unchecking the box. The main inbuilt apps like phone or map cannot be removed.
Specify a Default Music Provider
Let’s say that you have installed many music streaming apps in your Android device, then confusion arises as the Google detection will be a bit hard to detect the app you prefer so there are chances that a wrong song will be played.
In case you have downloaded Spotify and you have upgraded to premium account but if you haven’t linked your Spotify with Google assistant then it’s not possible to access your song list. Things would get easier if you have already linked because all you got to do is command the song but if you haven’t then each and every time you play a song you have to mention it to the assistant the app name, that is Spotify after mentioning the song. Google assistant will wrongly detect your command in this case and tell you that "you are not subscribed to YouTube".
This is why you have to link your Spotify all to Google assistant before heading out to drive so you won’t have any complications.
To set up a specific option get to the auto menu option in your Android device and click "Google assistant" now you will find "music" option when you scroll down. To set the music app as default, check the list of music apps that you have installed. Make sure you don’t set a music provider as primary if you come across a linked icon. So before making it your primary you have to link it with Google assistant to that specific service works as your initial music provider.

After you are done with all the settings and allocate one app for this purpose then for example when you say "play some romantic music" the Google assistant will instantly play music’s from your designated app. In case if you want to play music from some other providers this time, then you can still command google, for example - "lay rock music from YouTube".
Organize Your Contacts Easily
It is important for your to maintain a clear contact list which is also clean so that it would be much easier for you to access while driving. Let’s say you want to call John then if you say "call John" and in case if there are more than one John the your Assistant will as you to be more specific. So your conversation with your Google assistant will keep dragging so it will be a hindrance while you are driving.
So to ward off this problem you can clear all the unwanted duplicate contacts and keep your list clear by adding the last take to those specific contacts. Google assistant will get complicated if you have emoji’s or characters that aren’t very clear to read.
Earlier in days we could only save one contacts per name but now it might have separated in many contacts with the same name so make sure you check your device for any such occurrence. Lets say you have Mike and Mike home as separate numbers in your device so you wouldn’t remember this when ever you make a call.
Few Other Android Auto Options
So you are almost set to get to the road as you have already know tips and you are familiar with the auto commands in your device but there are few more things to consider before your set to head to the road. Let’s take at the important settings that we should be looking into. All what you got to do is head to the android auto app and access the settings.

You can make use of the tweak for the options below if you prefer.
Turn on day and night mode for the app - While navigating this option you can select the mode you prefer for example night or day.
Automatic music - If you are an ardent music player it if you want that podcast playing in the background as soon as you get into the car, you can tweak this option on.
Weather - The top of the display of your car can indicate the condition and the live temperature if you turn it on.
Make use of the conversation notifications - If you want complete control over your phone then you can remove notification from those group messages or individual.

To make the first line of a conversation arear on top - When you stop your car somewhere then you could take a quick view of your conversation if it’s switched on.
Have you come across android auto feature? If you haven’t then it’s time for your to take a look at this impressive feature if you drive a car. With this feature you can safely and easily have access to navigation, apps or your favorite music on the way. You can safely drive your vehicle while accessing these features.
have a more seamless driving experience with android auto and say bye to distraction. Let’s take a look at the tips and tricks to make use of this.
A previous version of Android auto which was designed by Google allows you to access your phones display but they no longer available as they are supposed to support only infotainment unit in your car . Google assistant driving mode is what you have to make use of now, which somewhat has the same features with slight differences.
Below we will take a look at some Android auto features. Note that these tips and tricks can be used for driving mode as well.
Take Advantage of Google Assistant
It necessary to master the Android auto features and, the Google assistant plays an important role in voice command. The Google assistant helps in safe driving and to provided information’s swiftly. All you have to do is provide a voice command if you want to turn of that music, give a call or to ask a question. You don’t have to touch your phone while driving.
All what you have to do is say "Ok Google" or you can turn on the Voice command button on your steering wheel. This way you can easily ask a question or skip a song . You could also make a call while you’re driving with just your voice command. The driving mode also provides a mic icon that you can tap while driving which will activate the Google Assistant.
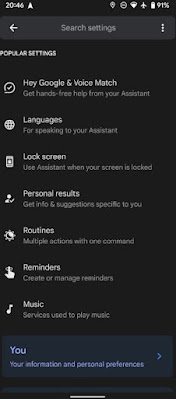
Tap "Hey Google detection" to make sure your Google Assistant is turned on. The option called “while driving” should be turn on in this menu. You don’t have to worry about turning on Google assistant if your screen is off because when the driving mode is on, your Google assistant will keep responding.
Give me a reminder in 30 minutes to buy some groceries.
Let me know the news today
Call Mary
How long would it take to go to park lane
Who won the world cup last night?
Stop song
Android Auto-Compatible Apps
It is dangerous when you are distracted with certain apps while driving so many of the apps are not supported by android auto. Don’t worry because there are many important and good apps that you can choose from. Below are a few apps that you can get.
Head to the Android auto page that you will find in Google apps. Below are the main categories of Android auto apps that would interest you.
Second one is messaging. In this option you can get WhatsApp, telegram, kik, Facebook messenger.
Category three is radio/news. Here you will get simple radio, iHeartRadio, ABC news, new your times, many other local radio apps you can get.
If you go to the driving mode or Android Auto, certain apps like music or radio will be shown if you have installed them. You can check what these apps provide you while you are driving.
A pop up notification will be seen when you get a new message if a messaging app is installed as the specifications are a bit different than the other apps that we saw. So if you get a message you have to cover the other person that you are driving so to let them know you can speak your message by tapping reply or you can also send automatic respond command.
Organizing Android Auto App List
Your home screen already provides the apps that support your Android device on the home screen but the problem arises if you have too many apps installed and it is cluttered all over. This would definitely be a hindrance for your driving.
Don’t worry as you can always omit or rearrange the apps on your home screen. To do this go to "customize launcher" on the menu of Android auto app. Here you can decide what to do.
Specify a Default Music Provider
Let’s say that you have installed many music streaming apps in your Android device, then confusion arises as the Google detection will be a bit hard to detect the app you prefer so there are chances that a wrong song will be played.
This is why you have to link your Spotify all to Google assistant before heading out to drive so you won’t have any complications.
To set up a specific option get to the auto menu option in your Android device and click "Google assistant" now you will find "music" option when you scroll down. To set the music app as default, check the list of music apps that you have installed. Make sure you don’t set a music provider as primary if you come across a linked icon. So before making it your primary you have to link it with Google assistant to that specific service works as your initial music provider.
Organize Your Contacts Easily
It is important for your to maintain a clear contact list which is also clean so that it would be much easier for you to access while driving. Let’s say you want to call John then if you say "call John" and in case if there are more than one John the your Assistant will as you to be more specific. So your conversation with your Google assistant will keep dragging so it will be a hindrance while you are driving.
So to ward off this problem you can clear all the unwanted duplicate contacts and keep your list clear by adding the last take to those specific contacts. Google assistant will get complicated if you have emoji’s or characters that aren’t very clear to read.
Earlier in days we could only save one contacts per name but now it might have separated in many contacts with the same name so make sure you check your device for any such occurrence. Lets say you have Mike and Mike home as separate numbers in your device so you wouldn’t remember this when ever you make a call.
Few Other Android Auto Options
So you are almost set to get to the road as you have already know tips and you are familiar with the auto commands in your device but there are few more things to consider before your set to head to the road. Let’s take at the important settings that we should be looking into. All what you got to do is head to the android auto app and access the settings.
Turn on day and night mode for the app - While navigating this option you can select the mode you prefer for example night or day.
Automatic music - If you are an ardent music player it if you want that podcast playing in the background as soon as you get into the car, you can tweak this option on.
Weather - The top of the display of your car can indicate the condition and the live temperature if you turn it on.
Make use of the conversation notifications - If you want complete control over your phone then you can remove notification from those group messages or individual.
Android Auto is Worth it..
So now you are familiar with those auto Android features that you can easily navigate. These are some of the wonderful options to keep you safe while you hit the road. One thing you should keep in your mind is that these features should not put you in danger so always keep your self focused on driving.
So now we are all set so even if you have some issues with the settings you could easily set them up.